Tibault & Toad

Posts from April 2012

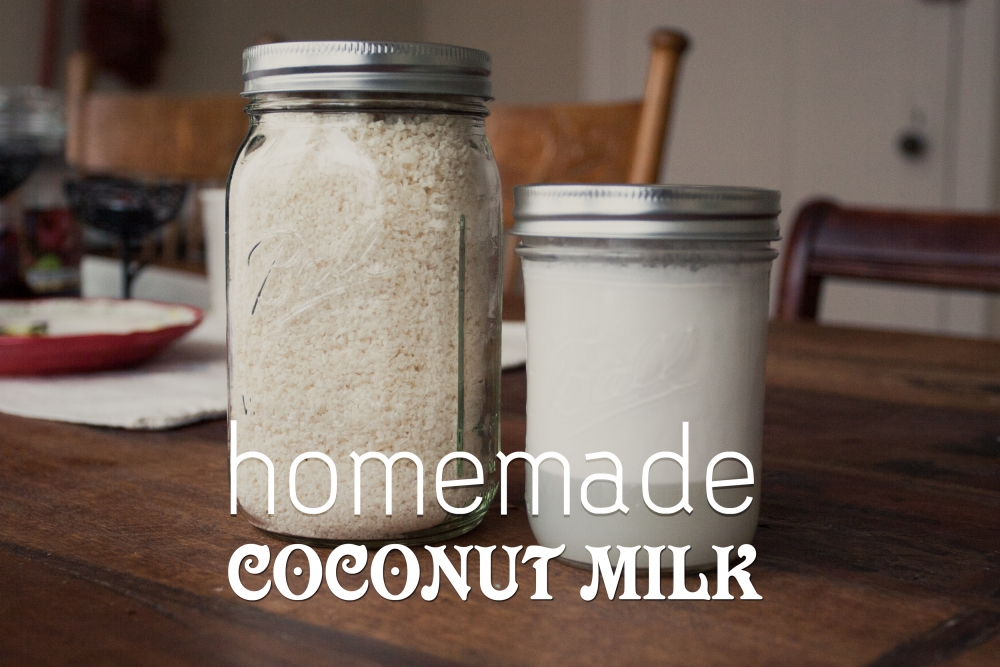
homemade coconut milk

Hardly anything is really from scratch these days. I've made recipes that call for coconut milk so many times, and without even thinking about it I dutifully grab the can opener and open up a can. That's where coconut milk comes from. . . right? Cans?

Canned coconut milk is convenient, but like all convenient things, it comes with a cost, both the actual cost (a can of Thai Kitchen coconut milk runs about $2.50, and a package of Bob's Red Mill shredded coconut runs about $3.50; two coconuts are $2 total), and the fact that store-bought products are not as fresh, and canned products are heated (killing natural enzymes/vitamins) and usually lined with bpa. Not to mention that learning how to make the basics yourself is super rewarding.

These directions are based on the ones found in Nourishing Traditions. You'll need two coconuts, and it yields a pint jar of coconut milk and a quart jar of dried, sweetened coconut meat.

Use a screw driver and hammer to poke two holes in the end of the coconut, then let the water drain out.

Place coconuts in a 350 degree oven until they crack (takes about 10 minutes - one made an audible cracking noise, the other was silent, so check the coconuts every few minutes for cracks).

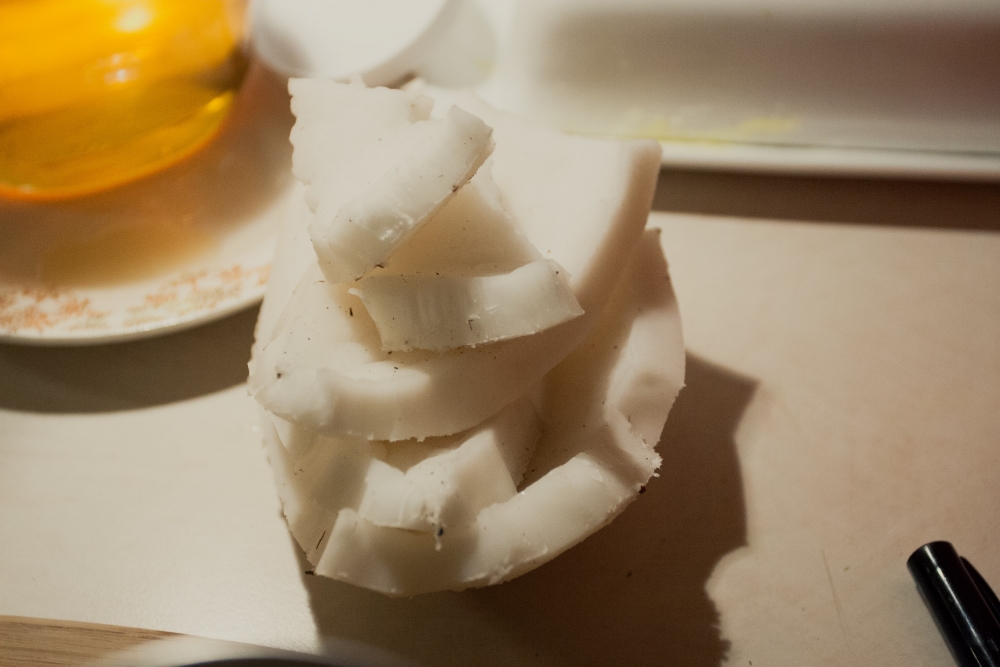
Then you need to remove the outer husk. One coconut came out easily, then other one we had to break into chunks and use a sharp knife to pry out the meat.

Use a vegetable peeler to peel off the brown inner skin, wash clean with water, and then chop into smaller pieces.

Process in the food processer until pieces are about pea sized, then add 1 cup warm water and process until nice and fluffy. If it seems so dry that it just flings to the top and stays there rather than turning over, add a tablespoon more of water at a time until it runs smoothly (it should NOT be watery, just very damp). 

Line a bowl with a clean kitchen towel and dump the coconut into the towel.

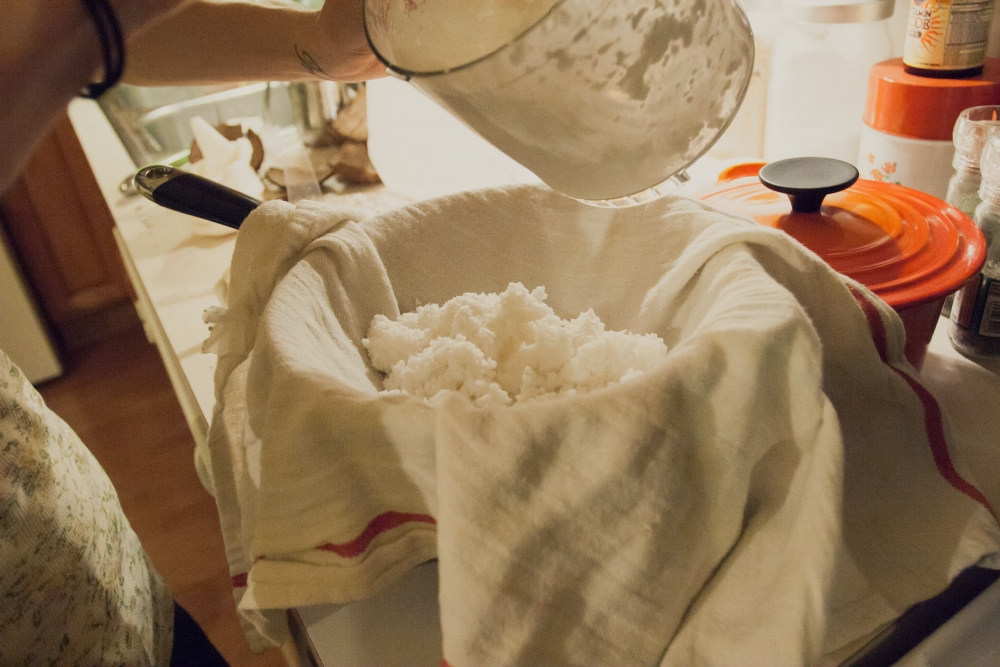
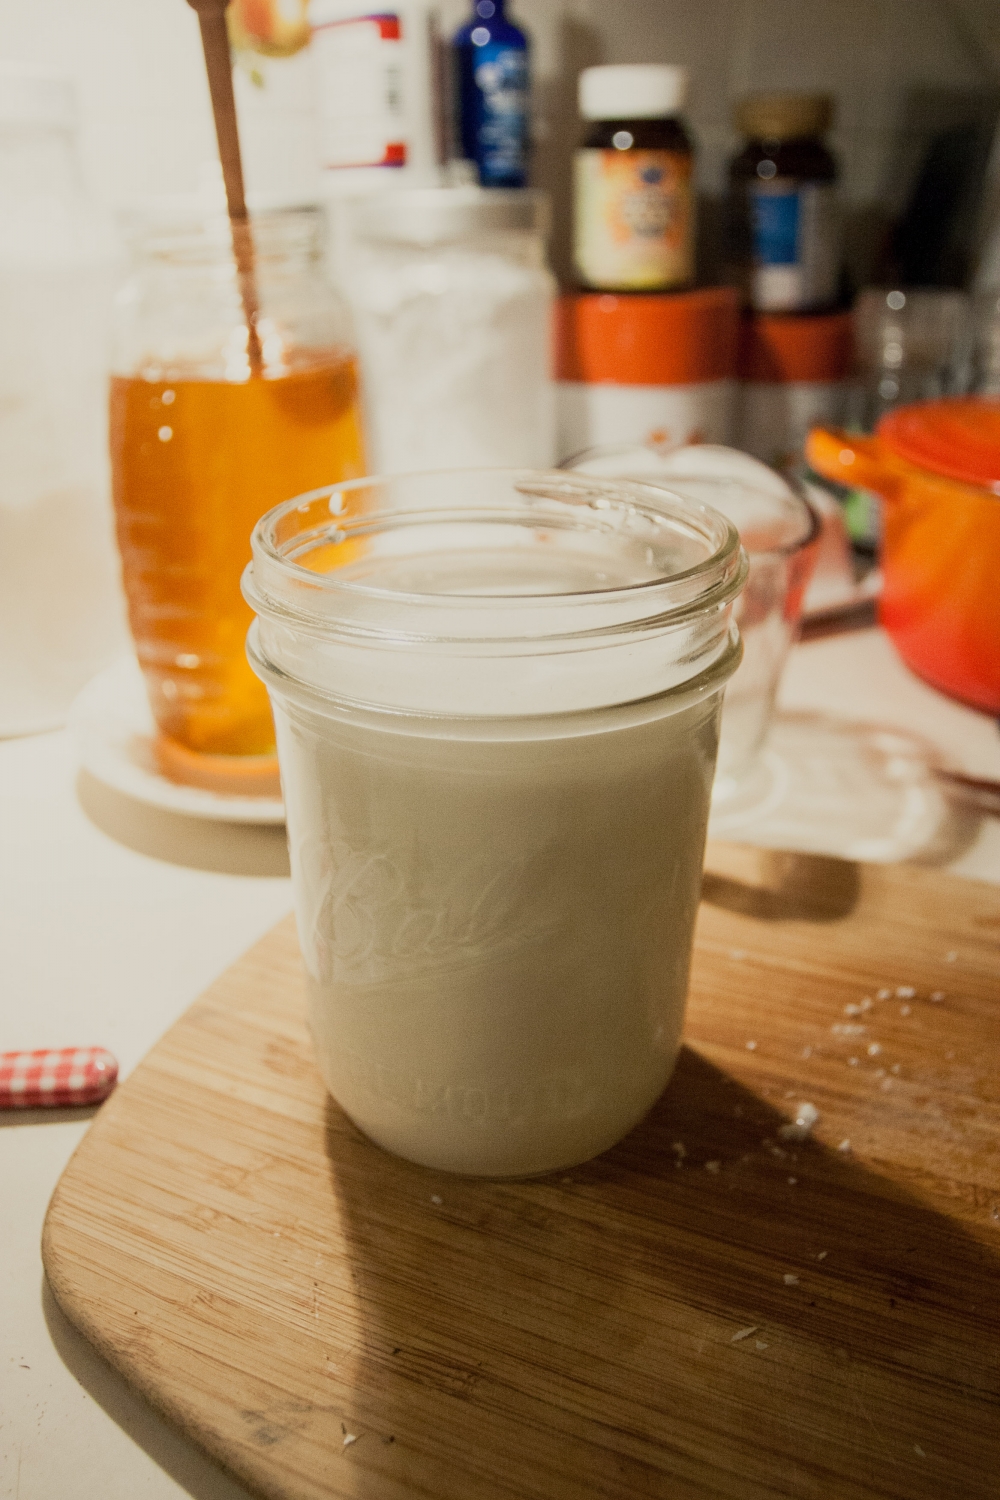
Then gather the four corners of the towel together and twist together tighter and tighter, simultaneously squeezing the juice out of the coconut meat with your other hand. Pour this into a clean mason jar and keep in the fridge for up to two days. This stuff is seriously delicious, I would drink it plain. Shake before using (it's normal for it to form a cream line, just like real milk).

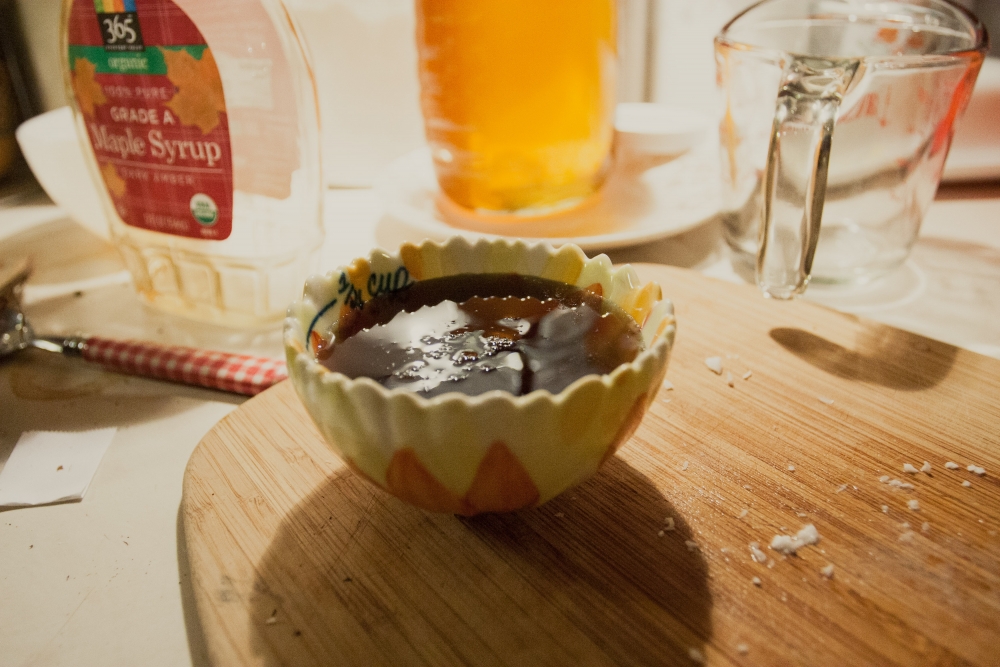
Take the remaining coconut meat, mix well with 1/4 cup grade B maple syrup (why grade B? it's more nutrient rich than other grades of maple syrup, and generally less refined). 

Spread out on a cookie sheet lightly oiled with coconut oil, and dry out in a 150 dregree oven for about 12 hours (our oven only goes down to 170, so it only took about 8 hours). 

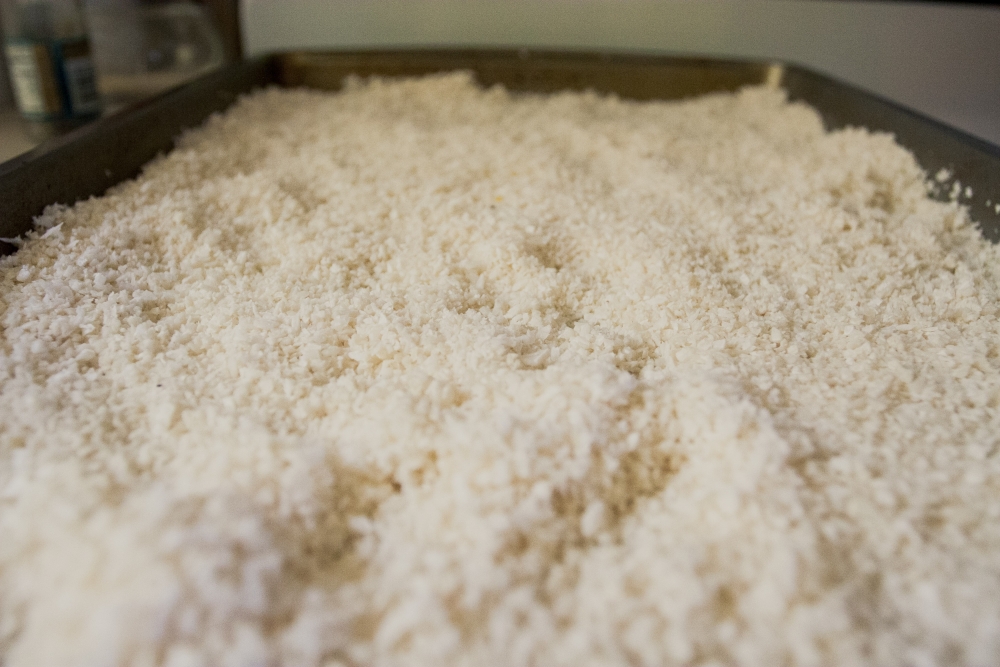
Store in an air-tight container at room temperature, or in the fridge or freezer.

It's delicious by itself, and it can also be sprinkled on yoghurt or oatmeal, or, of course, baked in macaroons (what do you think I did with it? :) ) 


Pin It

asparagus preserved three ways

It's the season for asparagus, which means you can get it local and it's packed full of nutrients and perfect for preserving. We got 6 bunches of it at the Farmer's Market on Saturday, so in addition to eating a lot of it, I've been canning, lactofermenting, and freezing. It is my goal this summer to get produce for preserving from the Farmer's Market every week, and hopefully share it here. I'm super excited for all the knowledge I hope to gain through this process, as well as the delicious and nutritious foods we'll have when winter rolls 'round.

Each of these three ways of preserving have their own pros and cons, which I'll detail quickly:

Canning: 

  • pros - canned goods stay good for a year, can be stored at room temperature (which frees up space in your fridge/freezer), and doesn't always require salt or whey
  • cons - requires an inital investment for equipment, sterilizes food which kills enzymes and some nutrients, requires heat energy

Loactofermenting:

  • pros - easier than canning (in my opinion), doesn't require any special equipment or energy, doesn't diminish the nutrient content of food, and is a source of probiotics
  • cons - food only lasts for 6 months (only 2 months if it is fruit), needs to be in cold storage (like a fridge or root cellar), lactofermented foods can be sort of an aquired taste, even fruit preserves require salt/whey

Freezing:

  • probably the easiest method, also does a good job of locking in nutrients, keeps food good up to a year (longer in a deep freezer)
  • takes up space in the freezer, foods have to be thawed

First up. . .

Canning

If you are not familiar with canning basics, check out this this link first. I used this recipe as a jumpoff point, with some slight tweaks. I used pint jars, added some dill, and used a mix of white wine and apple cider vinegar (because that's what I had). I got about 3 pint jars (I might have gotten 4, but I didn't prepare enough asparagus.)

Pickled Asparagus - 4 pints

  • 4 bunches of asparagus
  • 4 garlic cloves peeled
  • 1 lemon, scrubbed, sliced and deseeded
  • 4 teaspoons mustard seed
  • 4 sprigs dill
  • 2.5 cups vinegar
  • 2.5 cups water
  • 2.5 teaspoons pickling salt

Prep hot water bath and sterilize jars for 10 minutes. Wash asparagus, and trim so that they fit in jars with 3/4 inch to spare. Put your lids in a few inches of water, heat to a boil, cover, and turn off burner. Add vinegar, water and salt to a pot and bring to a boil. Meanwhile, set your hot jars on a kitchen towel, add a clove of garlic, sprig of dill and teaspoon of mustard seed to each jar. Pack asparagus in tightly and slide two lemon slices down inside each jar.  Ladel the hot pickling solution into each jar leaving 1/2 inch headspace. Release any large trapped air bubbles with a plastic knife or chopstick. Wipe rim, place lid, screw on band until finger-tip tight. Lower the jars back into the water, wait until the water returns to a rapid boil, process for 10 minutes and then lift jars and place them on a cutting board or towel until they are completely cooled. Then unscrew bands, check seals, and store.

Lactofermenting

For the brine I used the dill pickle solution from Nourishing Traditions.

Lactofermented Pickled Asparagus

  • 1 bunch of asparagus
  • 1 tablespoon mustard seeds
  • 2 tablespoons fresh dill, snipped
  • 1 tablespoon sea salt (it must be an unrefined sea salt such as Celtic, Himalayan pink salt, or Real Salt. If your "sea salt" is white, then its refined and devoid of the minerals that help the lactfermenting process work properly AND which help make you healthy, so you should switch anyways)
  • 4 tablespoons whey (or an additional tablespoon salt)
  • 1 cup filtered water (tap water contains chlorine, which inhibits the process)

Wash asparagus, trim and pack into a meticulously cleaned quart sized jar (I cut in half and use tops and stalks). Combine remaining ingredients in a bowl and stir until the salt dissolves, or add to the jar and shake to thoroughly mix them. If necessary add extra water to entirely cover the asparagus. Then screw on the lid tightly and leave at room temperature for three days before moving to the fridge. The fermentation process produces a lot of gas, so I find it necessary to ever so gently break the seal on the lid by loosening the band once or twice a day to let the air out, and then quickly re-tighten. These will stay good in the fridge for 6 months.

Freezing

This one is very straightforward. Wash and trim asparagus, blanche for 30 seconds to one minute in boiling water, then plunge into an ice bath. Lay out on a kitchen towel until dry, then roll up in paper towel, place inside a feezer bag, roll air out of bag, seal and store.

So what about you guys? Anybody started their summer preserving yet?


Pin It